
Why Paint Bubbles and Peels on Damp Walls (and Why Repainting Won't Fix It)
Paint bubbling or peeling after every repaint? The moisture problem behind it, why a fresh coat won't fix it, and what will.
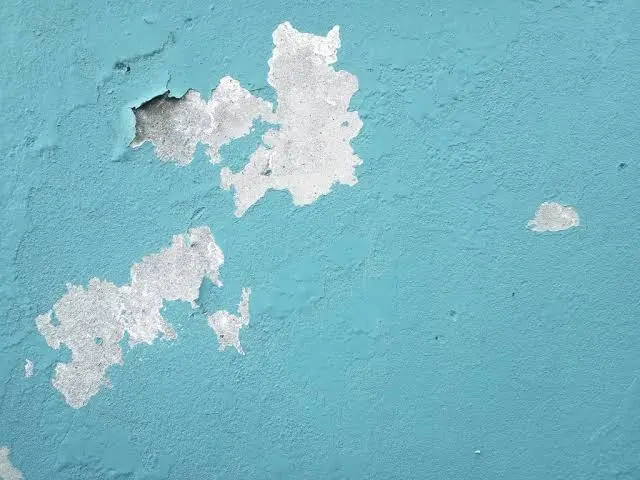
If you’ve already repainted a patch of wall once and watched it bubble or peel again a season later, you already know the frustrating part: it’s not that the paint job was bad. It’s that the same spot keeps failing no matter how carefully it’s done. That’s usually the first clue that the problem isn’t the paint at all — it’s what’s happening behind it.
What’s actually happening when paint bubbles
Paint film needs to bond to a dry, stable surface to stay put. When there’s moisture trapped in the wall behind that film — whether it’s soaked into the plaster or masonry, or condensing against the inside surface — that moisture eventually needs somewhere to go. As it works its way outward and turns to vapour, it pushes against the paint layer from underneath. The bond between paint and wall gives way first at the weakest point, which is what you see as a bubble or blister. Once enough pressure builds, the bubble splits and the paint peels away in flakes or sheets, often taking a bit of the surface plaster with it.
The paint isn’t the cause here — it’s the symptom showing up on the surface of a problem that’s happening inside the wall.
The three usual sources of moisture in Cape Town homes
Rising damp. Groundwater is drawn up through masonry by capillary action, most often in older homes built without a damp-proof course, or where an existing one has failed or been bridged (by a raised garden bed or a later addition, for example). You’ll typically see it as a band of damp, discoloured, or bubbling paint starting near floor level and creeping upward.
Penetrating damp. Water gets in from outside through failed pointing, hairline cracks, a poorly sealed window reveal, or a gutter and downpipe that isn’t doing its job. Cape Town’s wind-driven winter rain is particularly good at finding these weak points on exposed, coastal-facing walls.
Condensation. Less about the building envelope and more about ventilation — warm, moist air from cooking, showering, or drying laundry indoors meets a cooler wall surface and condenses. It’s most common in bathrooms, kitchens, and closed-up rooms during the colder months, and shows up as damp patches or mould in corners and behind furniture rather than a rising band.
Why repainting alone doesn’t fix it — and often makes the next failure worse
This is the part that catches people out: painting over a damp patch doesn’t get rid of the moisture, it just seals it back in. The wall keeps drawing or absorbing water from whatever source caused the problem in the first place, and that moisture still needs to escape. A new coat of paint just becomes the next surface it has to push through.
Worse, each cycle tends to leave the wall in worse shape than before. As moisture evaporates at the surface, it often leaves behind mineral salts drawn out of the plaster or brick — a white, powdery residue called efflorescence. Those salts crystallise underneath the new paint film, which weakens adhesion even further. That’s why the second or third repaint in the same spot often fails faster than the first one did, and why simply “trying a better paint” rarely solves it.
What actually has to happen before you repaint
Fixing this properly means treating it in the right order:
- Identify and fix the moisture source. This is a structural repairs job, not a painting one — it might mean repairing or installing a damp-proof course, repointing and sealing cracks, correcting drainage and gutter runs, or improving ventilation, depending on which of the three sources is at play. Painting before this step is done is painting over a problem that hasn’t gone anywhere.
- Let the wall dry out fully. Masonry holds moisture for longer than it looks like it should — rushing this step is one of the most common reasons a “fixed” wall fails again within months.
- Prepare the surface properly. Loose and flaking paint, mould, mildew, and efflorescence all need to come off before new paint goes on, or you’re just building the next failure into the first coat. This is exactly what pressure cleaning is for — it’s the same reason contaminated, poorly prepped surfaces are one of the leading causes of premature paint failure in the first place.
- Repaint with the right system. Once the wall is dry and properly prepped, a suitable paint system will actually hold.
Quick self-check
If you’re not sure whether you’re dealing with a damp problem or just an old paint job, look for:
- Bubbling or blistering paint, especially in a band near floor level or around window reveals
- Paint peeling away in flakes or sheets rather than fine cracking
- A musty smell in the room, even when it looks dry
- White, chalky, powdery deposits on the surface (efflorescence)
- Paint or plaster that feels soft, tacky, or crumbly rather than solid
If any of that sounds familiar, get the moisture source diagnosed before you buy another tin of paint — we offer structural assessments and repairs across Cape Town, and can advise whether pressure cleaning and reprepping the surface is enough or whether there’s a source that needs fixing first.
Need help with this in Cape Town?
Get a free, no-obligation quote from Paint & Renov8.